
This application has it's own scene tree in which sessions store their computed outputs, but you can also create, adjust and remove parts of the scene tree yourself. (Example: In some cases you might want to adjust the geometry that you get back from our servers. You might want to hide some objects first, or simply don't want to display them at all. In most cases, there is no need to adjust the scene tree though.)
The scene tree is a tree structure with a single root node. Every node can have any number of children and data items. The data items contain the actual information, whereas the nodes are only used to maintain and manage the hierarchy.
Data items can simply be changed and adjusted. Only the version of the data item has to be updated to notify the renderer that a change has happened.
Basic Setup
Before we do anything, the scene tree has already been created. There is nothing in it besides the root node. So let's just look at how the scene tree looks after we create a single session. Our scene tree now change as a node was added automatically. Let's assume, the session has two outputs with one content each. Then the scene tree will look like this:
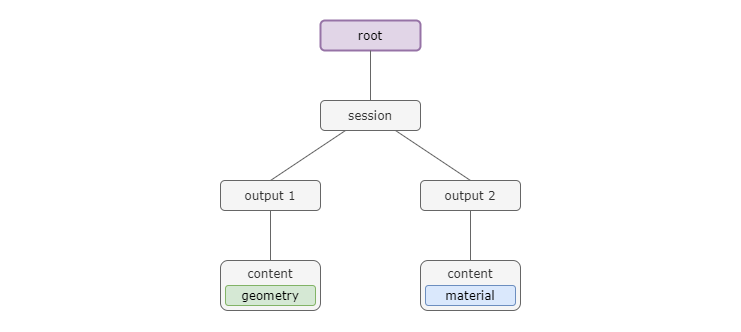
Please note that the geometry and data items will not be directly in these nodes. This visualization is simplified. In reality, there are many more children that depict the hierarchy of the geometry.
In the sections below, we describe how to manipulate the scene tree using the API. Grasshopper designers can find out more here about how to influence the scene tree using attributes in their definition. The structure defined in Grasshopper will be mirrored in the outputs resulting from parameter customization requests, including naturally the default geometry coming after initializing the session.
Copying Nodes
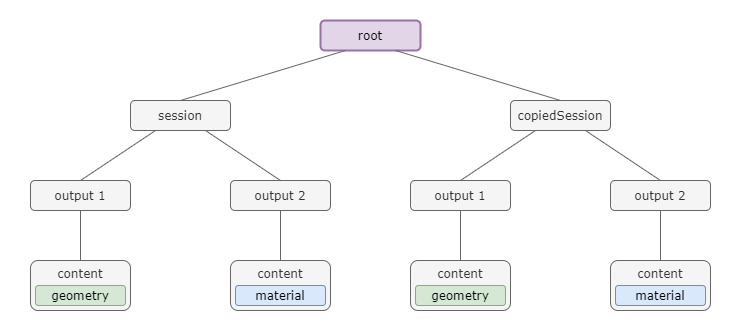
If we would customize the scene again, every output that is loaded again would be overwritten. Therefore, we now save our session node by copying it. Additionally, we translate it to see both at once and customize the scene.
// clone the node
const clonedNode = session.node.clone();

// add a transformation to it
clonedNode.transformations.push({
  id: "transformation",
  matrix: mat4.fromTranslation(mat4.create(), vec3.fromValues(0, 25, 0))
});

// update the version of the node
clonedNode.updateVersion();

// add the node to the scenetree
sceneTree.root.addChild(clonedNode);
sceneTree.root.updateVersion();

// update everything
viewport.update();

// read out the parameter with the specific name
const lengthParameter = session.getParameterByName("Length")[0];

// update the value
lengthParameter.value = 6;

// and customize the scene
await session.customize();
The result is now that we have the geometry two times, once in the old configuration and once in the new configuration.
Traversing the Scene Tree
You can traverse the scene tree and its data by using the utility functions traverse and traverseData.
// traverse all descendants of a node and apply the callback
const traverseCallback = (n: ITreeNode) => {
  console.log(n);
};
session.node.traverse(traverseCallback);

// traverse all data items of this node and its descendants and apply the callback
const traverseDataCallback = (d: ITreeNodeData) => {
  console.log(d);
};
session.node.traverseData(traverseDataCallback);