
Those components allow to define geometry that can interacted with in the online ShapeDiver viewer. When an interaction is complete in the viewer, information about the objects and how they were interacted with is sent to the definition and can be used during further computations.
Components
Filtering objects for interactions
All interaction components include filtering options, allowing to specify which objects in the scene should be targeted for respective interactions:
-
The Selection Input component allows to filter which objects should be selectable in the viewer.
-
The Gumball Input component allows to filter which objects can be transformed using gumball widgets.
-
The Points Input component allows to filter objects that the points can snap to in the scene.
While each component's context is slightly different, the filtering strategy is common to all of them.
In all cases, the targeted geometry need to be displayed using one of the following two components of the ShapeDiver plugin: the glTF 2.0 Display component or the ShapeDiver Output component. We describe the method in details in the context of the glTF component in the section below (most common use case). In the last section, we explain how to adapt the method when using the ShapeDiver Output component.
Using geometry from a glTF 2.0 Display component
Most applications display geometry in the viewer using the glTF 2.0 Display component. In this section, we describe how to setup and reference geometry when making use of this component.
Basics
Here are the key steps to follow in order to filter objects successfully:
-
Make sure the
nameattribute is set inside targeted objects. In all cases, filters target geometry present in the viewer scene through theirnameattribute. Read more about attributes here. -
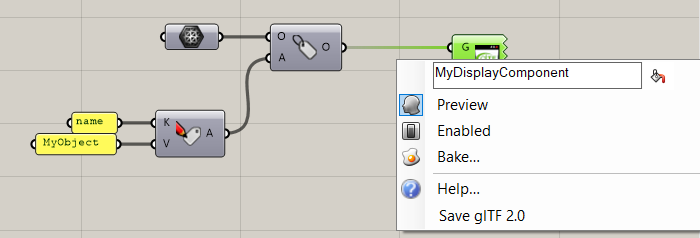
Use the glTF 2.0 Display component to display geometry in the viewer. This component ensures that the name attribute is included in the objects of the online viewer scene. Also make sure to set the name of the display component to something unique.
In the example below, we display one mesh with the name attribute set to MyObject and include it in a glTF 2.0 Display component that we named MyDisplayComponent.
-
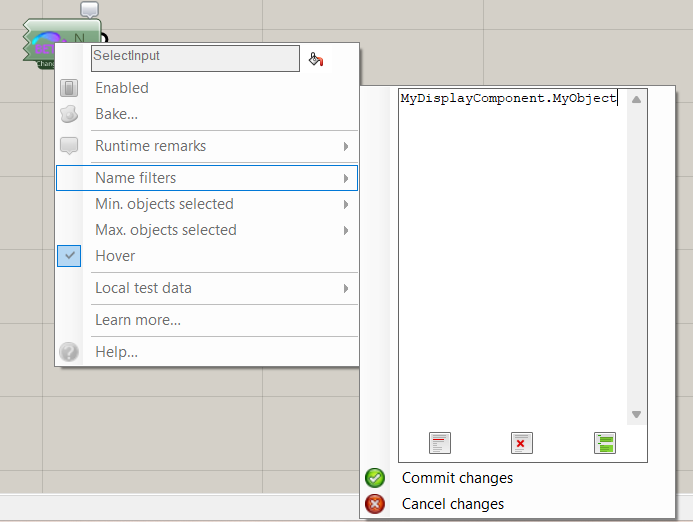
Once steps 1 and 2 are taken care of, you can set the filter option of the relevant interaction component you are working with. In order to point to a specific object, use the dot-separated notation
DISPLAY_COMPONENT_NAME.NAME_ATTRIBUTE.
In the example above, the filter should be set to MyDisplayComponent.MyObject:
Using wildcards
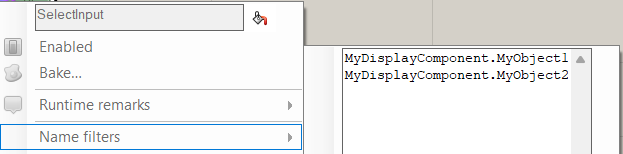
The name filters of interaction components allow to specify a list of names. For example, if one wants to filter two objects MyObject1 and MyObject2, both stored in the same “MyDisplayComponent”, each of them could be added in the list, as follows:
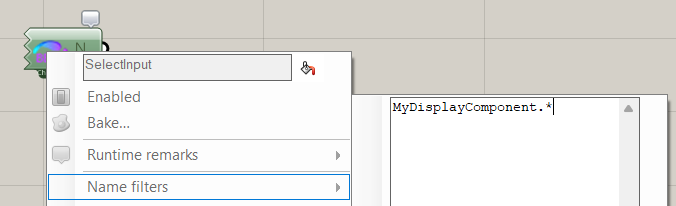
However, this method is not always practical, in case lots of objects should be targeted, or there might even be an unknown number of objects (depending on the other inputs of the definition). In order to handle these cases, it is possible to use a so-called wildcard notation; using the symbol , one can target multiple objects simultaneously. In our example, it would be possible to simply write MyDisplayComponent.* in the filter field in order to target both objects, or any number of objects that both belong to “MyDisplayComponent” and have a defined name attribute:
Fine-grained control using the scene tree
In the examples above, we have worked with simple names, but the name attribute also supports a dot-separated notation used to organize the scene tree in the online viewer. You can read more about how to use name to influence the scene tree here. Consider again the example from this article:
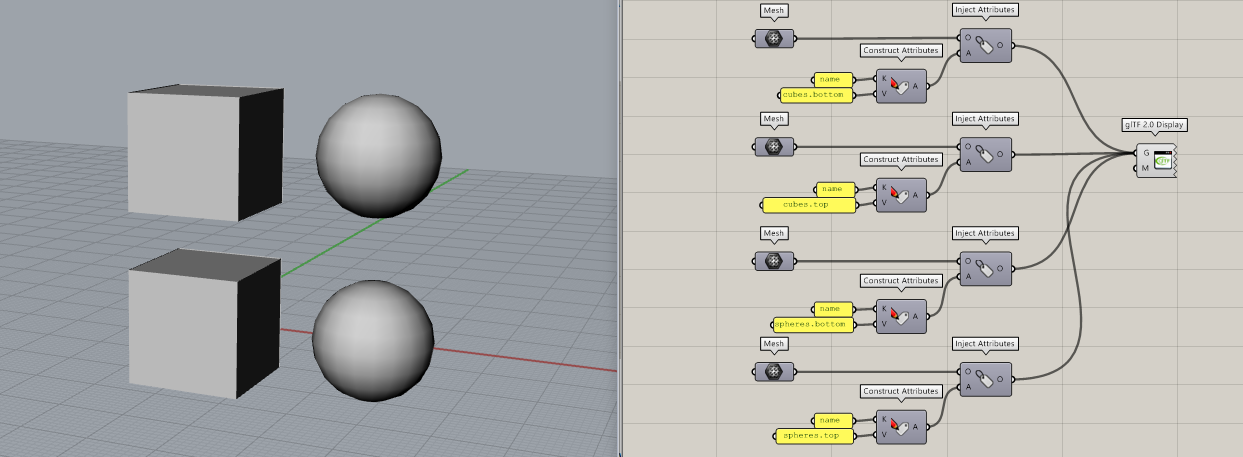
The display component contains four objects named cubes.top, cubes.bottom, spheres.top and spheres.bottom. In the online viewer, it means the scene is organized like this:
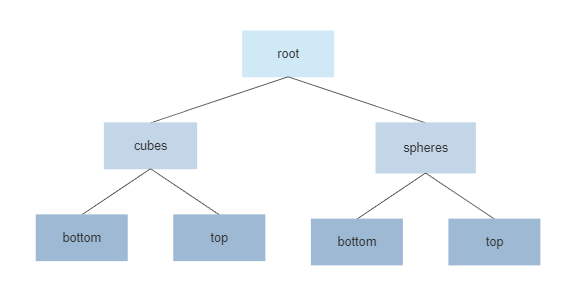
In the case of name filters, organizing the scene tree can help controlling which objects or groups of objects can be selected with a single-click in the viewer. In this example:
-
If one specifies
MyDisplayComponent.cubesandMyDisplayComponent.spheresin the filter, only two objects will be selectable in the viewer: both spheres together on the one hand, and both cubes together on the other. -
The same result can be achieved by only specifying
MyDisplayComponent.*. -
In order to make all objects selectable individually, one can specify
-
All names individually:
MyDisplayComponent.cubes.top, etc… -
Use a wildcard at the end, just
MyDisplayComponent.cubes.*andMyDisplayComponent.spheres.*. -
Use two wildcards, simply
MyDisplayComponent.*.*
-
-
If one wants to only make the two bottom objects selectable, it is possible to use a wildcard in the middle as follows:
MyDisplayComponent.*.bottom.
Using geometry from a ShapeDiver Output component
In specific use cases (mainly attributes visualization and desktop clients), you might be using the ShapeDiver Output component in your definition instead of the standard glTF 2.0 Display component.
In this context, setting up and referencing geometry for interaction filtering works slightly differently:
-
The first part of the filter path also starts with the component’s name:
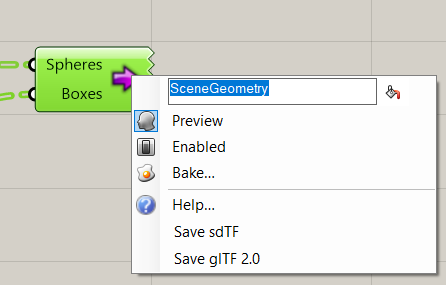
-
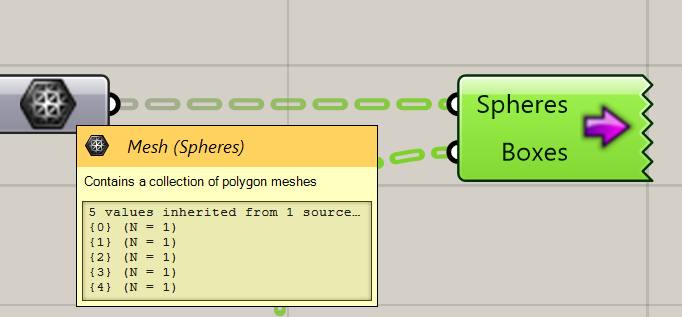
The second part of the filter path is determined by the top-level chunk name defined by the component’s inputs. You can add inputs to the component by clicking on the + handle after zooming sufficiently:
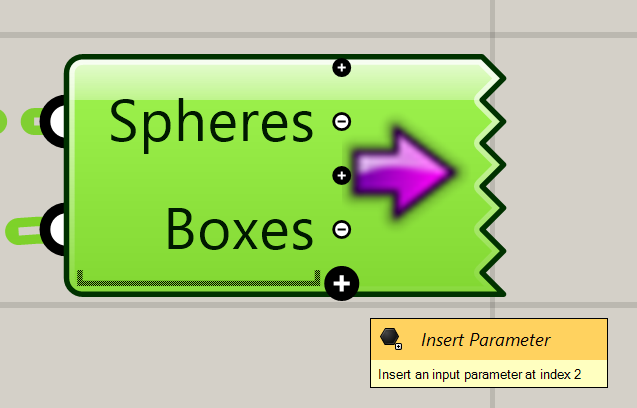
-
The third part of the path is defined by the order of branches coming to each input of the component. It takes the form [i] where i refers to the i-th top-level branch of the tree (regardless of the tree structure):
Therefore, in the screenshots above, one can:
-
Allow to select the entire contents of the component at once by specifying the filter
SceneGeometry -
Allow to select either all spheres or all boxes at once using the filter
SceneGeometry.* -
Allow to select spheres individually using the filter
SceneGeometry.Spheres.* -
Limit, for example, selection to the spheres in the first and third branch of the Spheres tree by specifying the two filters
SceneGeometry.Spheres.[0]andSceneGeometry.Spheres.[2]