Skema is a generative design platform for the AEC industry. It creates a continuous workflow from early design through BIM delivery. Skema preserves design intent across every phase, improving speed, consistency, and decision-making.
The ShapeDiver integration in Skema allows to seamlessly build automations within Skema models, without leaving a web browser. We introduce below how the connection works and the important points to pay attention to when building a ShapeDiver model for Skema.
You can also find a video of a concrete use case for the integration recorded by Skema here.
Grasshopper tutorial
You can find a documented Grasshopper file here to follow along the guide below.
Prerequisites
-
A Professional Skema account. If you don’t have one already, you can create a free Skema account now; it comes with a 30-day Professional trial with a full access to its features.
-
A ShapeDiver account with a free or commercial subscription.
-
Rhino 7 or 8 with the following Grasshopper plugins (both can be installed from the package manager):
-
Skema - currently in version 1.2.0 (version installed on ShapeDiver, soon updated to the latest version).
-
The latest version of the ShapeDiver plugin.
-
Authentication in Skema
Add the ShapeDiver Integration to the project
Starting from a Skema project, the ShapeDiver integration for Skema is accessible through the BIM view of the project. At the bottom, click on the “Plugins and Connectors” button. The ShapeDiver Integration will be available in the list.
Authenticate to ShapeDiver
When starting the integration, a new window becomes available within the BIM panel. For now, it mostly looks empty. The first thing we want to do is establish a connection between the Skema platform and the ShapeDiver platform.
-
Click on the “ShapeDiver plugin” button. A new sub-window opens with some information about the connection status and a button to “Log in” to ShapeDiver.
-
Click on the “Log in” button. A new browser window will pop up.
-
If you are already logged in the ShapeDiver platform in your browser, the window will simply ask you if you allow Skema to access your ShapeDiver account. Click on “Yes” to proceed.
-
If you are logged out, the window will give you the option to log in, and then proceed with the authentication.
-
After those steps, notice that the dot next to the “ShapeDiver plugin” button becomes green, to indicate that the connection is successful. If you click again on the “ShapeDiver plugin” button, the panel should confirm that the connection was successful. However, it still shows a warning saying that the connection is registered but not active.
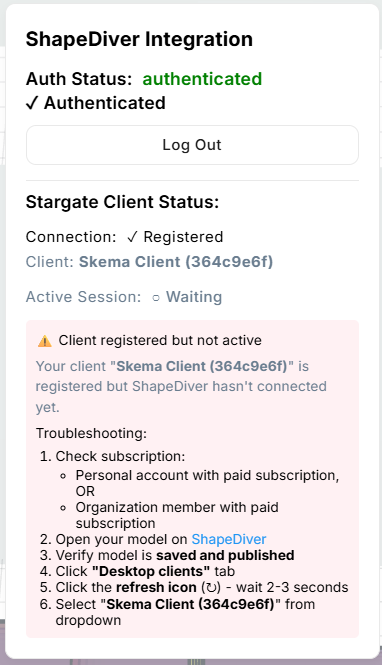
That’s normal! The last step will happen once you have a ShapeDiver App ready to use and connect with the Skema project. We will come back to the ShapeDiver integration window later, once we do.
Setup in Grasshopper
Importing the Revit Export Model from Skema to a ShapeDiver App
The traditional way to use Skema in Grasshopper is the following:
-
Use the Skema Companies component to authenticate to your Skema account.
-
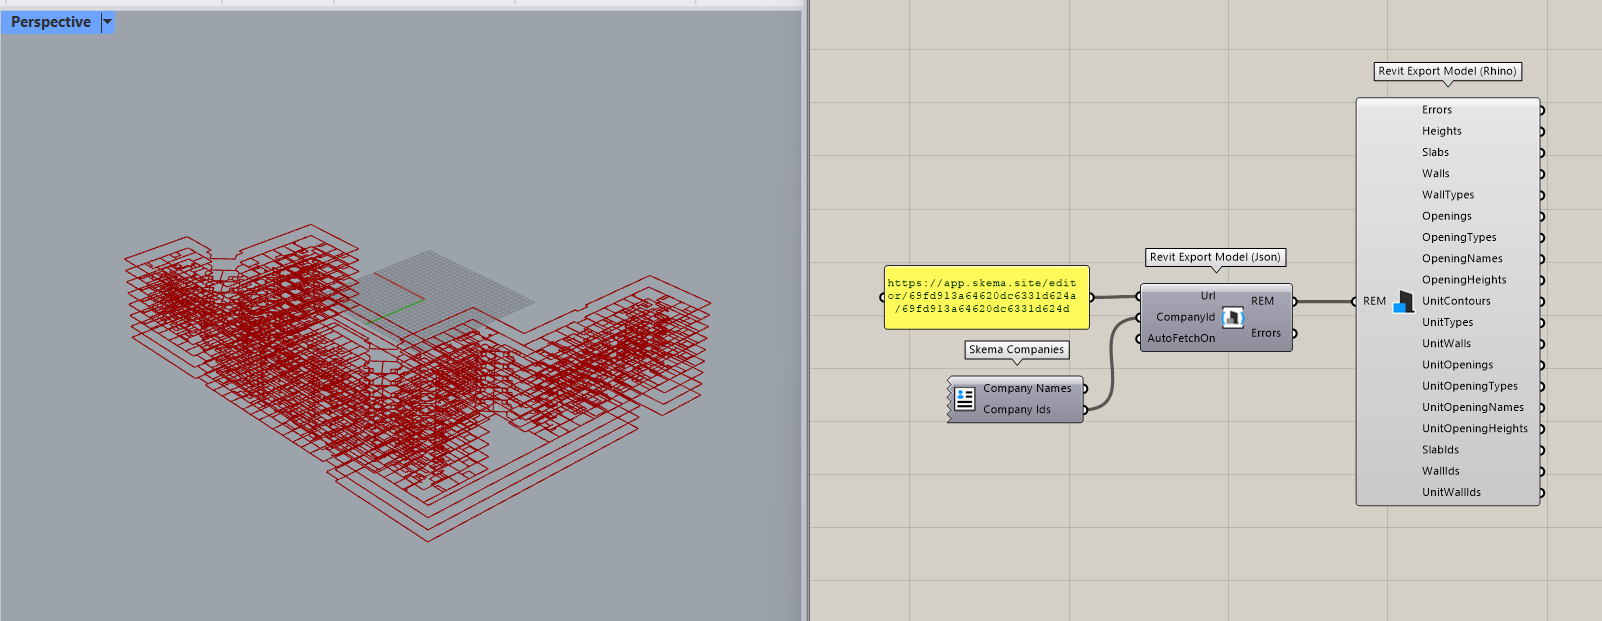
Use the Revit Export Model (Json) component to reference the URL of a Skema project and get the REM model.
-
Use the Revit Export Model (Rhino) component to convert the REM model into geometry and data for Grasshopper.
See an example setup below:
When building a ShapeDiver App for the Skema integration, the first two steps can be bypassed: the REM model will be sent directly from the Skema project to the ShapeDiver App, using the live connection we will describe in the next paragraph.
The key is to replace the Skema Companies and Revit Export Model (Json) component with a ShapeDiver Import Text component. This component will be used by the integration to transfer the REM model as a JSON object.
In order to have the Import Text component recognized as an input from the Skema client, give it a name starting with the SG_ prefix. In our example, we use the name SG_SkemaBuilding.
Tip: when working locally in Grasshopper, you can save the REM Text in a json file and connect it as a file path to the Import Text component. This trick makes it possible to test the workflow locally, until the definition is uploaded to ShapeDiver and the online App is connected to a Skema model.
Baking geometry back to the Skema model
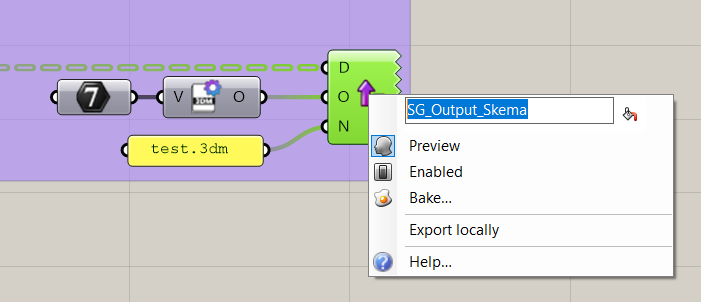
Connected Apps can also bake geometry back to the BIM model in Skema. In Grasshopper, one just needs to include a Download Export component with the geometry to be exported. For Skema to identify it as a relevant output, the export file needs to be in the 3dm format and its name must include the SG_ prefix (like for the input, see above):
Build the App
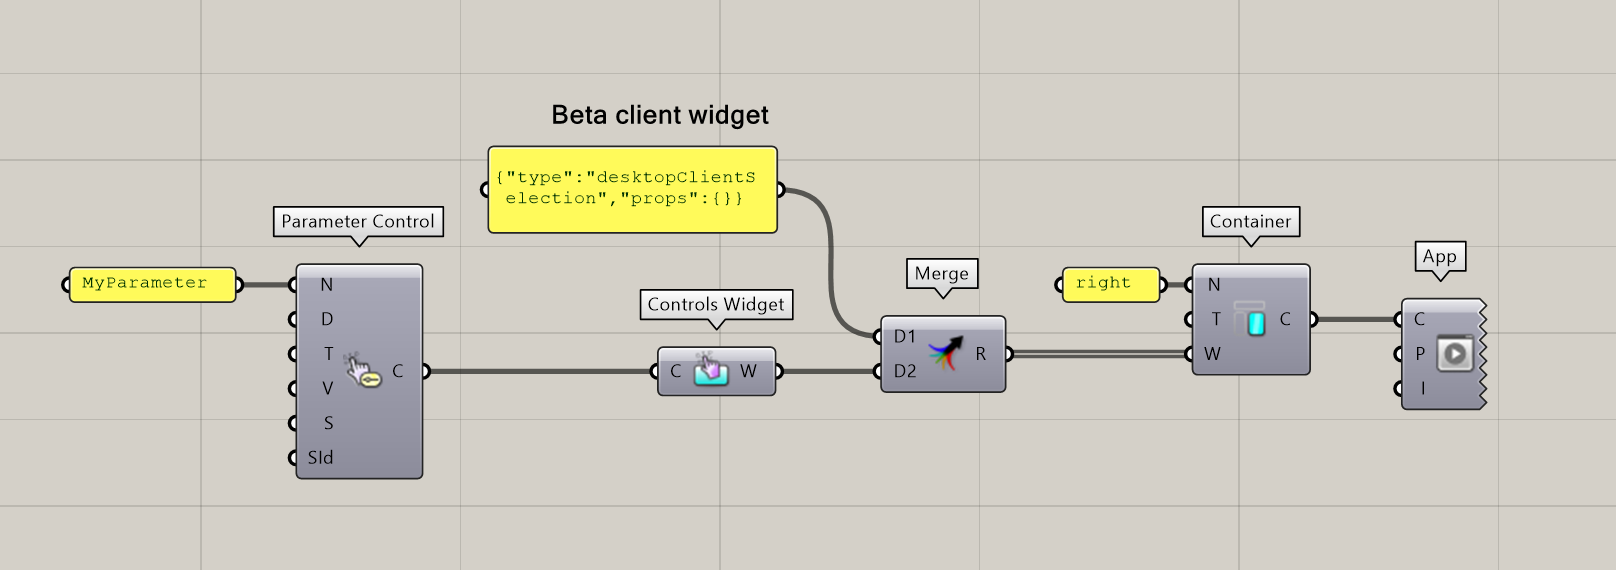
If you are already a ShapeDiver user, this part is a piece of cake. Otherwise, check out our App Builder documentation here. One important point is to include the client widget in the App. This is the widget needed to establish a live connection with an open Skema project. At the moment, this widget does not have a final component in the plugin, but it can be included using a JSON object:
{"type":"desktopClientSelection","props":{}}
See a simple App example below including only the client widget and a controls widget:
Importing the Skema selection state
One can build more advanced automations between Skema and ShapeDiver by also importing the selection state in the Skema project, and use it to drive the algorithm in the Grasshopper definition.
Documentation in progress!
Upload and setup on the ShapeDiver platform
When the Grasshopper file is ready, it can be uploaded to ShapeDiver. You can read more about the upload and setup process here.
In the context of the Skema integration, it is important to setup two specific points:
-
Make sure to add the
app.skema.sitedomain to the list of whitelisted domains of your account. -
Allow direct embedding from the model’s edit page.
Connecting an App and exchanging data with a Skema project
Now that the ShapeDiver App is ready, we can open it in a browser tab next to the Skema project. Make sure you are still authenticated (see the “Authentication in Skema” paragraph above).
Start a live connection
In your App you can see the client connection widget, and if the authentication is still registered in Skema, you can find the Skema client in the list:
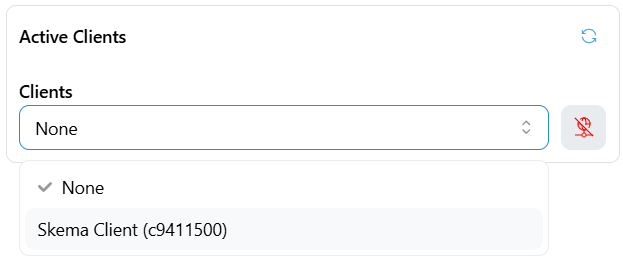
If you do not see it, try to use the reload button (top right) until it appears. After selecting Skema, the network icon should become green in the App, and Skema should also show a clean status:

Import the REM model from Skema to the ShapeDiver App
If you have added it as an input of the App, you should see the button corresponding to the Import Text component. Its name is shown without the SG_ used to identify it. Simply click on the button to import the REM model to the App. If data was successfully imported, the button should turn from orange to blue:
Bake geometry back to the Skema project
Baking geometry works in a similar way. You should see an export button corresponding to the Download Export component if you have added it in a Controls widget of the App. Clicking on it will instantly create the corresponding geometry in the Skema project:
Adding ShapeDiver App shortcuts to the Skema project
For convenience, it is possible to save shortcuts to specific ShapeDiver Apps to Skema. In the ShapeDiver extension, click on “Add new ShapeDiver” to create a shortcut including a title, description, screenshot and the link to a ShapeDiver App. In the future, clicking on the shortcut will directly open the App ready to be used along the project.