ShapeDiver for Shopify
Official ShapeDiver App for Shopify
If you want to create an eCommerce website using Shopify, we provide a Shopify app based on App Builder. Create your ShapeDiver App entirely in Grasshopper without writing any code. The App can then be used directly inside a shop created with Shopify and opens as an overlay on the product page. With App Builder's custom “Add To Cart” action component, users can play with the configurator and add their configured product to the cart directly.
Click here to install the Shopify app in your store.
This feature is brand new! Contact us, join a community catchup, an onboarding call or leave a message on our forum if you have any questions or feedback.
Setup and settings of the Shopify App
Please follow the steps in the app setup guide, which is shown in your store’s admin panel. Our Shopify app will ask you to start a subscription before the setup process can be finished. We offer a 14 day free trial, and if you are a Shopify Partner you can use the app for free on development stores.

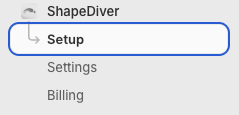
Menu of the ShapeDiver app for Shopify
Once you have completed the setup process, you can define some global settings that can be applied to individual Shopify products.
Configuring App Builder for Shopify Products
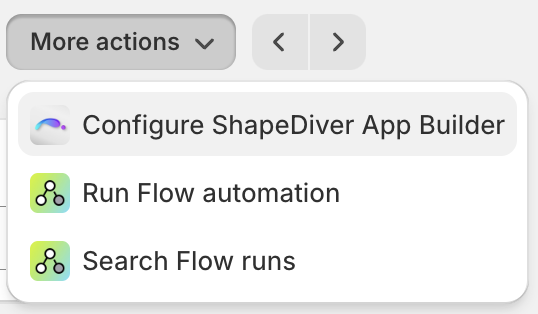
Once the ShapeDiver App for Shopify is installed, use your Shopify store’s admin panel to configure App Builder configurators for your products. In the admin panel, navigate to Products, open a product, and click More Actions → Configure ShapeDiver App Builder.

Click More Actions → Configure ShapeDiver App Builder
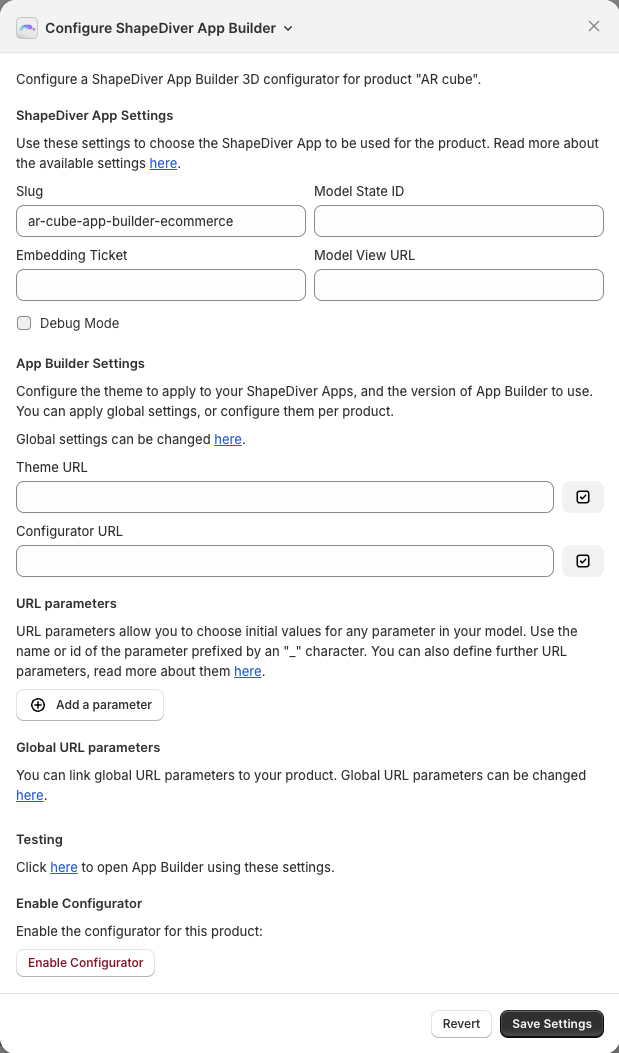
The following dialog opens, showing settings that can be configured:

Settings of the App Builder configurator linked to a Shopify product
This table contains a description of all available settings:
Setting | Description |
|---|---|
Slug | You can reference your ShapeDiver app either using its slug, or a ticket and model view URL. The slug is the last part of the URL of your model. You can leave this empty if you provide ticket and Model View URL. Make sure to whitelist the domain of your store, and to enable iframe embedding for your model. For previewing your products, you can whitelist |
Model State ID | An optional model state ID of your ShapeDiver model. If left empty, the model's default state will be used. Read more about model states here. |
Embedding Ticket | A ticket for embedding for your ShapeDiver model. If you specify a ticket, you also need to specify the model view URL of your model. You can leave this empty if you provide a slug. Make sure to whitelist the domain of your store, and to enable direct embedding for your model. For previewing your products, you can whitelist |
Model View URL | The model view URL of your ShapeDiver model. If you specify a model view URL, you also need to specify a ticket for embedding for your model. You can leave this empty if you provide a slug. |
Theme URL | Optional URL of the JSON file defining the App Builder settings of the configurator. Use this to configure the theme to be applied to App Builder. This can be a relative or absolute URL. Read more about customizing the theme here. The JSON file can also define the You can use Shopify’s file upload feature to host these JSON files. If you have defined a global default Theme URL, you can link it to the product here. |
Configurator URL | Optional configurator URL for this product. If left empty, the default version of ShapeDiver App Builder will be used, which is https://appbuilder.shapediver.com/v1/main/latest/ Read more about versioning of App Builder here. If you are using iJewel3D, please configure the Configurator URL as described here: ShapeDiver iJewel3D integration If you have defined a default Configurator URL in the global settings of the Shopify app, you can link it to the product here. |
URL parameters | URL parameters allow you to influence the behavior of your App Builder configurator. Read more about it in section Embed Apps in external websites. |
Global URL parameters | You can define URL parameters in the global settings of the Shopify app, and link them to the product. |
After saving the settings for a product for the first time, the configurator will be disabled by default, which means the Configure button will not show up on the product page yet. Click Enable Configurator to activate it.
If you preview a product in the theme editor, the Configure button will show up regardless of whether the configurator is enabled or not.
The settings described above are translated by the Shopify App into an iframe URL for embedding App Builder. You can read more about embedding App Builder apps here.
Order details
The Shopify app includes a block for displaying configuration details on order detail pages. Navigate to an order detail page and enable the block as shown below:

Hover the “App blocks” section and click “order-details-block”

You can pin the block for all staff

Pinned block
The block includes links to the configurations that are part of the order. These links include the URL parameter called context set to value order. Please see page Embed Apps in external websites for details. To summarize, if your model includes a direct text input whose name is “context”, its value will be set to “order”. As an example, you can use this information to display additional App Builder widgets to the user, e.g. for downloading production data.
Third-party Shopify integration
Our partners at New Branch have developed a ShapeDiver integration for Shopify called Product Lab. Contact them if you are interested in getting started with your shop now! The setup might require some custom development to match your theme and requirements.
