Display

Grasshopper definitions can be uploaded an rendered on ShapeDiver without using the ShapeDiver plugin, but the display and material components of the plugin allow much more advanced control. Find in the table below a summary of the different ways to display geometry in the viewer.
Download a tutorial definition comparing all display methods in Grasshopper.
Method / components | Basic properties | Advanced properties | Textures | Bake in desktop clients | ||
|---|---|---|---|---|---|---|
|
|
|
|
|
| |
|
|
|
|
|
| |
|
|
|
|
|
| |
|
|
|
|
|
|
Turn preview on for Grasshopper components with geometry outputs
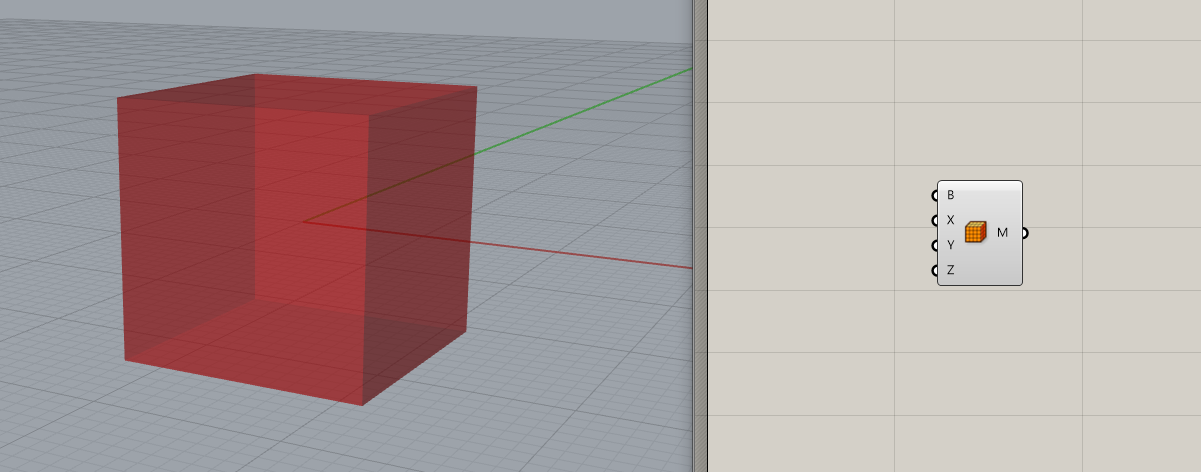
Every geometry with the preview turned on in the Rhino viewport will be displayed in the online ShapeDiver viewer. For all components except Custom Preview and the ShapeDiver Display components described below, the geometry will be displayed with a default material since no material information is contained in those components. Consider the following definition, which contains a single box component:

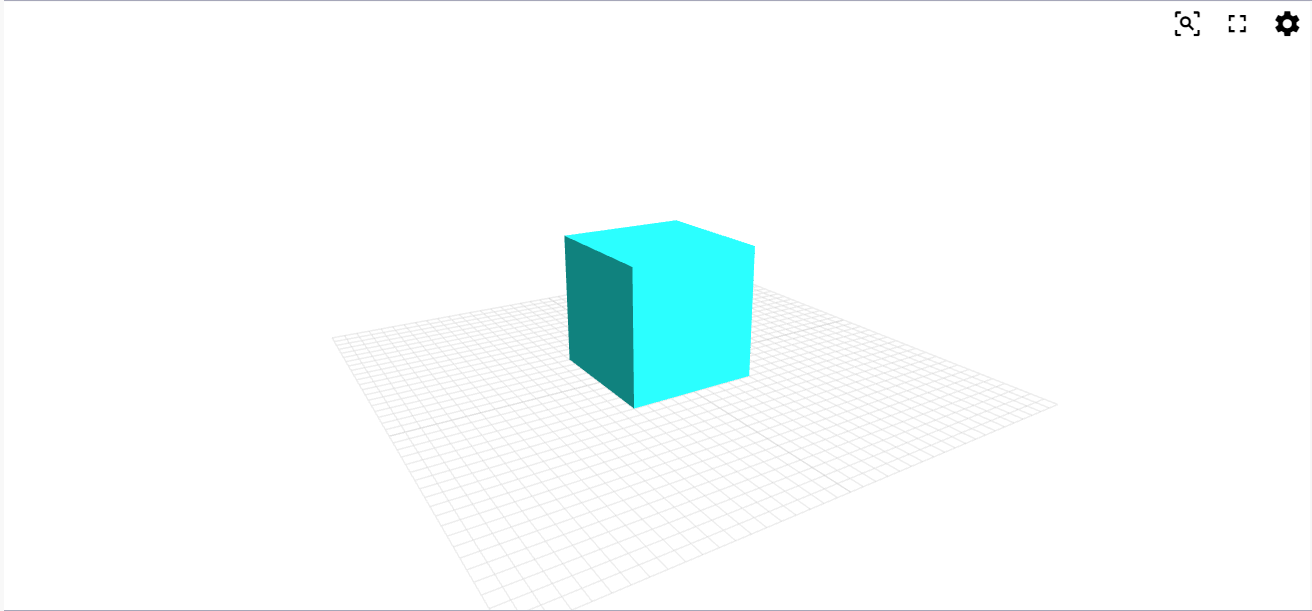
This simple definition can be uploaded to ShapeDiver. In the online viewer, the cube will be displayed using the default material, which is a bright blue that makes it easy to spot:

In most cases, you want to disable the preview for most components and only keep the display components with preview turned on (see next sections).
The Default glTF version setting influences display geometry created in this way.
Use the standard Create Material and Custom Preview components
In order to play with materials, one can use the standard preview components included in Grasshopper. Define a material with the Create Material component and preview how it looks directly in Grasshopper with the Custom Preview component.

This model will display the materials as expected after it is uploaded on ShapeDiver. We do our best to render the outputs of those components in a satisfying way. However, they will not make use of the advanced shaders of the online viewer using PBR (physically based rendering), and textures cannot be applied to them. This is the reason why we developed alternative components with more advanced possibilities. We recommend using them for all applications.
The Default glTF version setting influences display geometry created in this way.
Use the display components of the ShapeDiver plugin
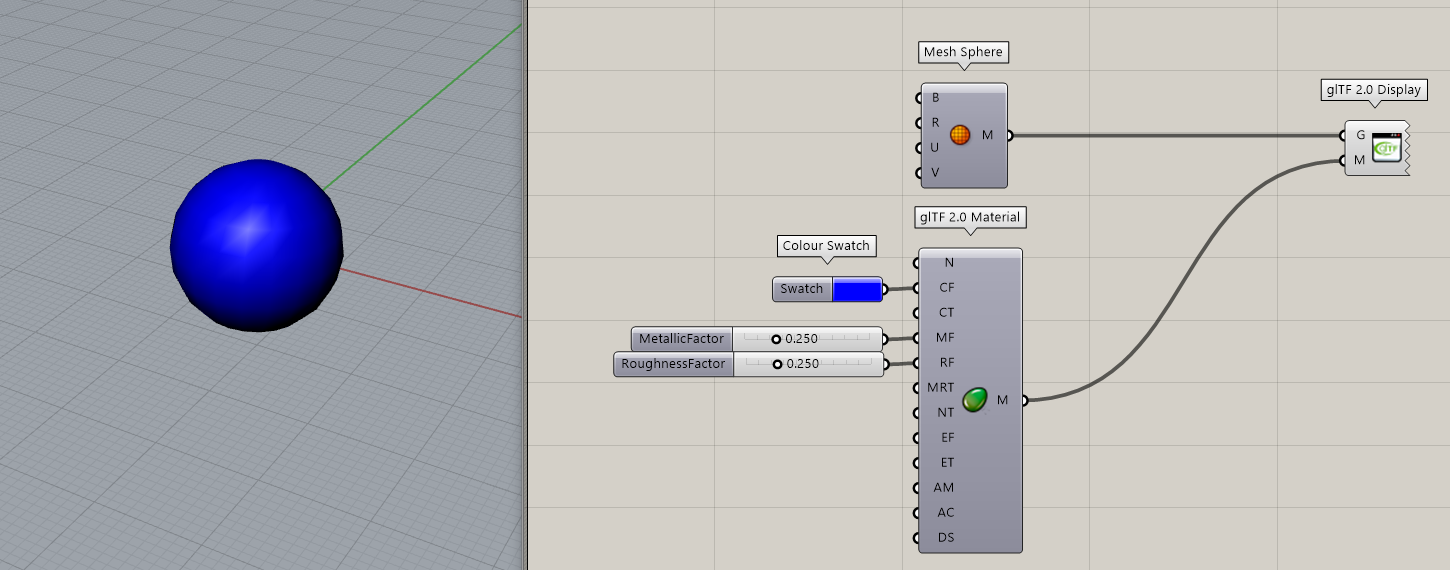
The ShapeDiver plugin contains components that can be used to replace Create Material and Custom Preview. Construct a material definition using one of the material components (glTF 2.0 Material or Preset Material) and send it to one of the display components (glTF 2.0 Display or External Display). See below an example using the glTF 2.0 Material component and the glTF 2.0 Display component:

The ShapeDiver display components let you define PBR materials that are optimized for viewing online, including the various textures used for those materials. For these reasons, we recommend to use them for any application where advanced rendering is needed.
The plugin also includes two components called Legacy Material and Legacy Display, which are still available for backwards compatibility purposes but should in most cases not be used. Read more about these components and specific reasons to use them.
Use the ShapeDiver Output component
The ShapeDiver Output component includes display capabilities, among many other features. The display aspects of the component work very similarly to the Display components and allow to achieve the same results in most cases regarding rendering. However, it also allows to embed data structure and additional metadata (in the form of attributes), which can be used to connect to several ShapeDiver features such as attribute visualization and desktop clients.
As a general comment, the display components are slightly easier to use and produce smaller outputs for applications that only need to render geometry outputs in the web viewer. However, they can easily be switched for the ShapeDiver Output component for any more advanced application which require it.
Materials and the Viewer API
The API of our Viewer offers extensive functionality to change materials directly without involving computations of the Grasshopper model. This kind be used for quickly switching between materials in the frontend, e.g. for e-Commerce applications. Also it provides access to material properties that are not yet exposed in our material components. Please refer to section Materials for details about this.
An important hint related to this: Giving unique names to the material components in your model will make it easier to identify and replace materials using the viewer’s API.
Create materials from JSON objects
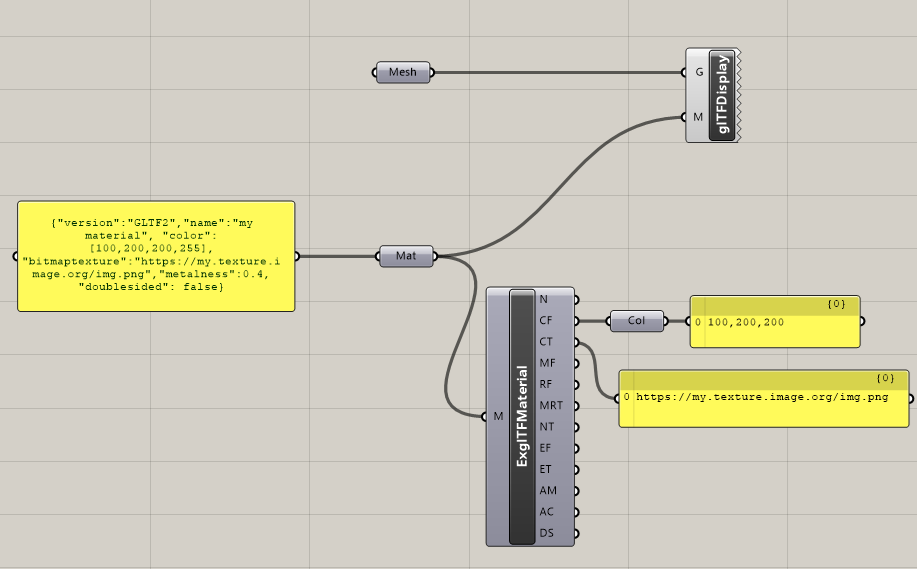
It is possible to create a material from a JSON string, including referenced textures. Simply connect a correctly formatted JSON string to a material parameter to automatically do the conversion:

For glTF 2.0 materials, the JSON specification is the following:
{
  "version": "glTF2.0", // <-- or "GLTF2"
  "name": "NAME_OF_MATERIAL",
  "color": [211,211,211,255], // <-- RGBA integer values
  "bitmaptexture": "TEXTURE_URL",
  "metalness": 0.0 // <-- between 0 and 1
  "metalnesstexture": "TEXTURE_URL",
  "roughness": 1.0 // <-- between 0 and 1
  "roughnesstexture": "TEXTURE_URL",
  "normaltexture": "TEXTURE_URL",
  "transparency": 0.0 // <-- between 0 and 1
  "transparencytexture": "TEXTURE_URL",
  "emissive": [0,0,0,255], // <-- RGBA integer values
  "emissivetexture": "TEXTURE_URL",
  "alphamode": "opaque", // opaque, blend, or mask
  "alphacutoff": 0.5 // <-- between 0 and 1
  "doublesided": true,
}
For glTF 2.0, only the following properties are used and mapped to the corresponding glTF 2.0 material property. Please check the spec of glTF 2.0 materials here: https://registry.khronos.org/glTF/specs/2.0/glTF-2.0.html#materials
JSON property | glTF 2.0 material property |
|---|---|
| |
| alpha channel (if present) defines opacity |
| |
| |
| |
| metalness = B-channel (blue) roughness = G-channel (green) |
| |
| |
| |
| |
| |
|
