
The ShapeDiver App for Shopify allows you to sell truly bespoke products, having limitless variations. To that end, the app includes a so-called cart transform function that can replace the price, title, and image of line items at the moment they are being added to the cart. Some parts of this feature require a Shopify Plus subscription. Depending on your shop’s theme, it may also be necessary to edit the theme’s liquid code to display the custom title and image.
The following table provides an overview.
|
Line item property |
Shopify Plus The cart transform function uses a |
Other subscription The cart transform function uses a |
|---|---|---|
|
Price |
No changes are necessary to the theme. The price is set directly for the line item. |
No changes are necessary to the theme. The price is set for the bundle. |
|
Title |
A custom title is set directly for the line item, if your Add To Cart action specifies a title. If you do not specify a title, a default title will be used for the updated line item, which includes the product title and the line item’s model state ID. Example: Product name (Ntc06FJi9W5Hxc12) |
A custom title is set for the bundle, if your Add To Cart action specifies a title. If you do not specify a title, a default title will be used for the bundle, which includes the product title and the line item’s model state ID. Example: Product name (Ntc06FJi9W5Hxc12) |
|
Image |
A custom image is set directly for the line item, if your Add To Cart action specifies an image. Custom images are uploaded to Shopify’s CDN, and will be visible in your store’s admin panel (Content → Files). The naming scheme of these images follows this pattern: Please note that the image upload and processing by Shopify might take a few seconds, and therefore prolongs the time it takes to add a custom item to the cart. |
No custom image can be set for the bundle. If your Add To Cart action specifies an image, it will be ignored. |
The custom title and image are shown in various places, including the cart, checkout, and order notification emails. Please see Shopify’s docs for details.
Depending on your theme, it may still be necessary to adapt the theme’s liquid code to display the custom title and image. See the further sections of this help page for details.
Updating the theme to render custom line item titles
Your theme’s liquid code for rendering the cart might render the product’s default title, regardless of whether a custom title has been set for the line item. If this is the case, you need to edit the code of your theme: https://help.shopify.com/en/manual/online-store/themes/customizing-themes/edit-code/edit-theme-code
These are the required steps:
-
Locate the code that renders the cart line items.
-
For the Horizon theme, this can be found in
snippets→card-products.liquid -
For the Dawn theme, this can be found in
sections→main-cart-items.liquid
-
-
Search for occurrences of
item.product.title, and replace them withitem.titlewherever you want the custom title to be rendered.
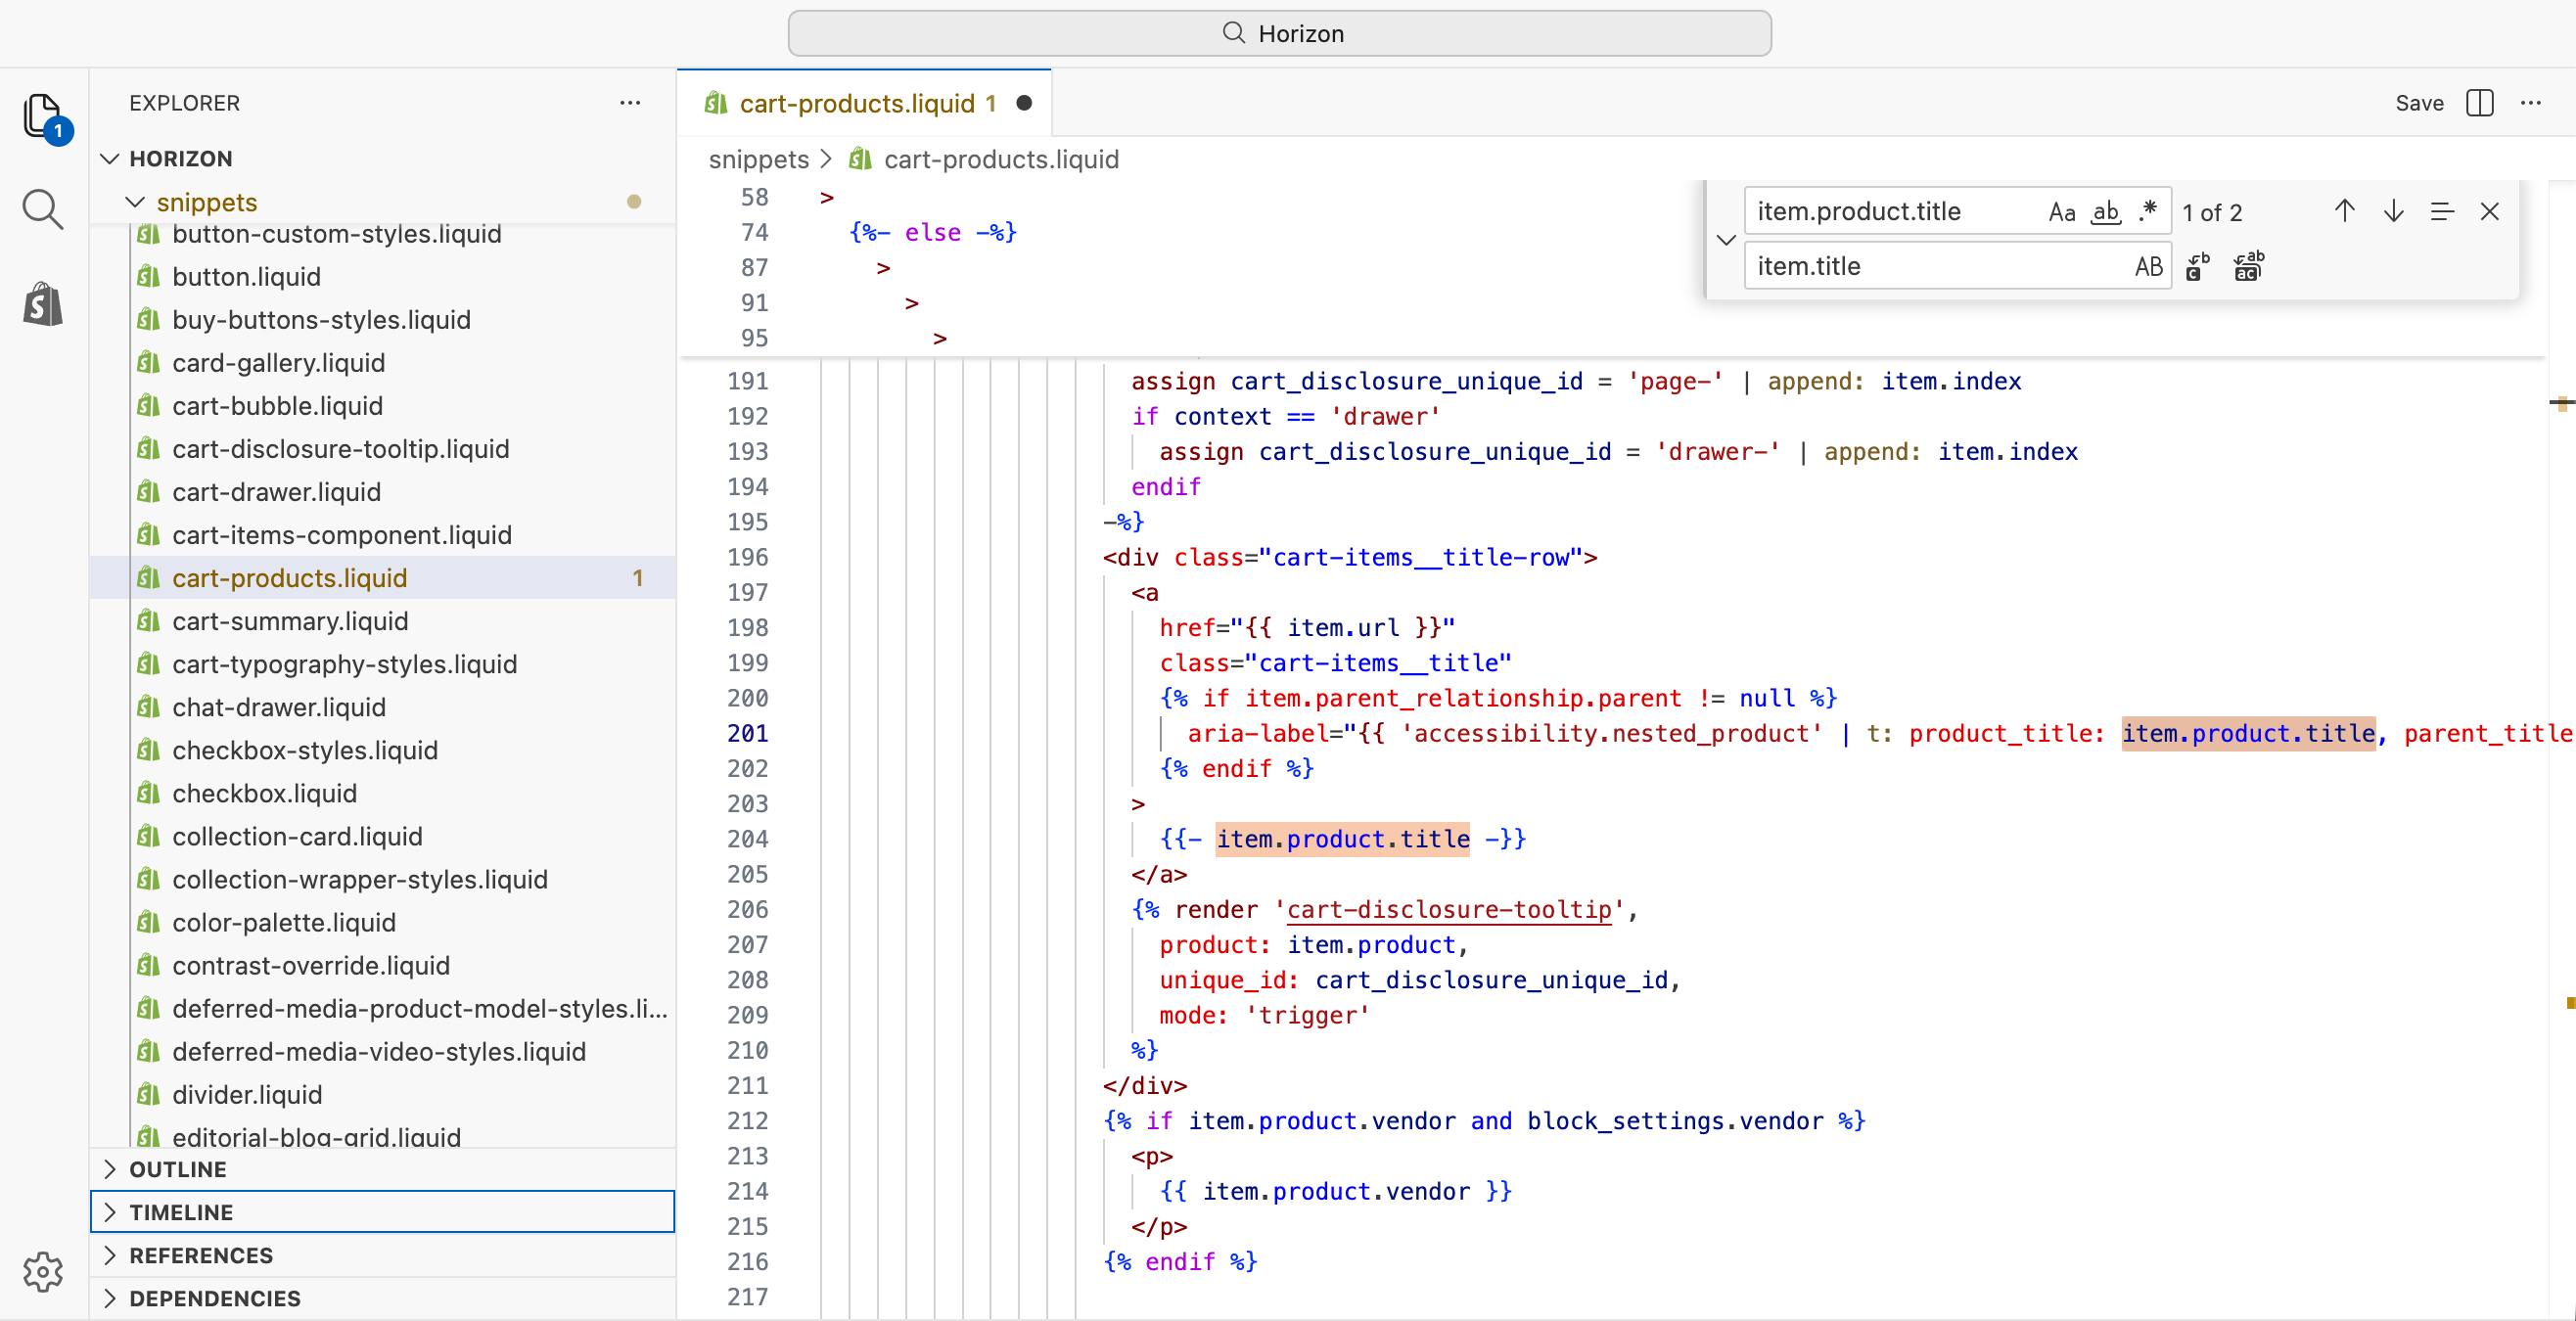
item.product.title with item.title
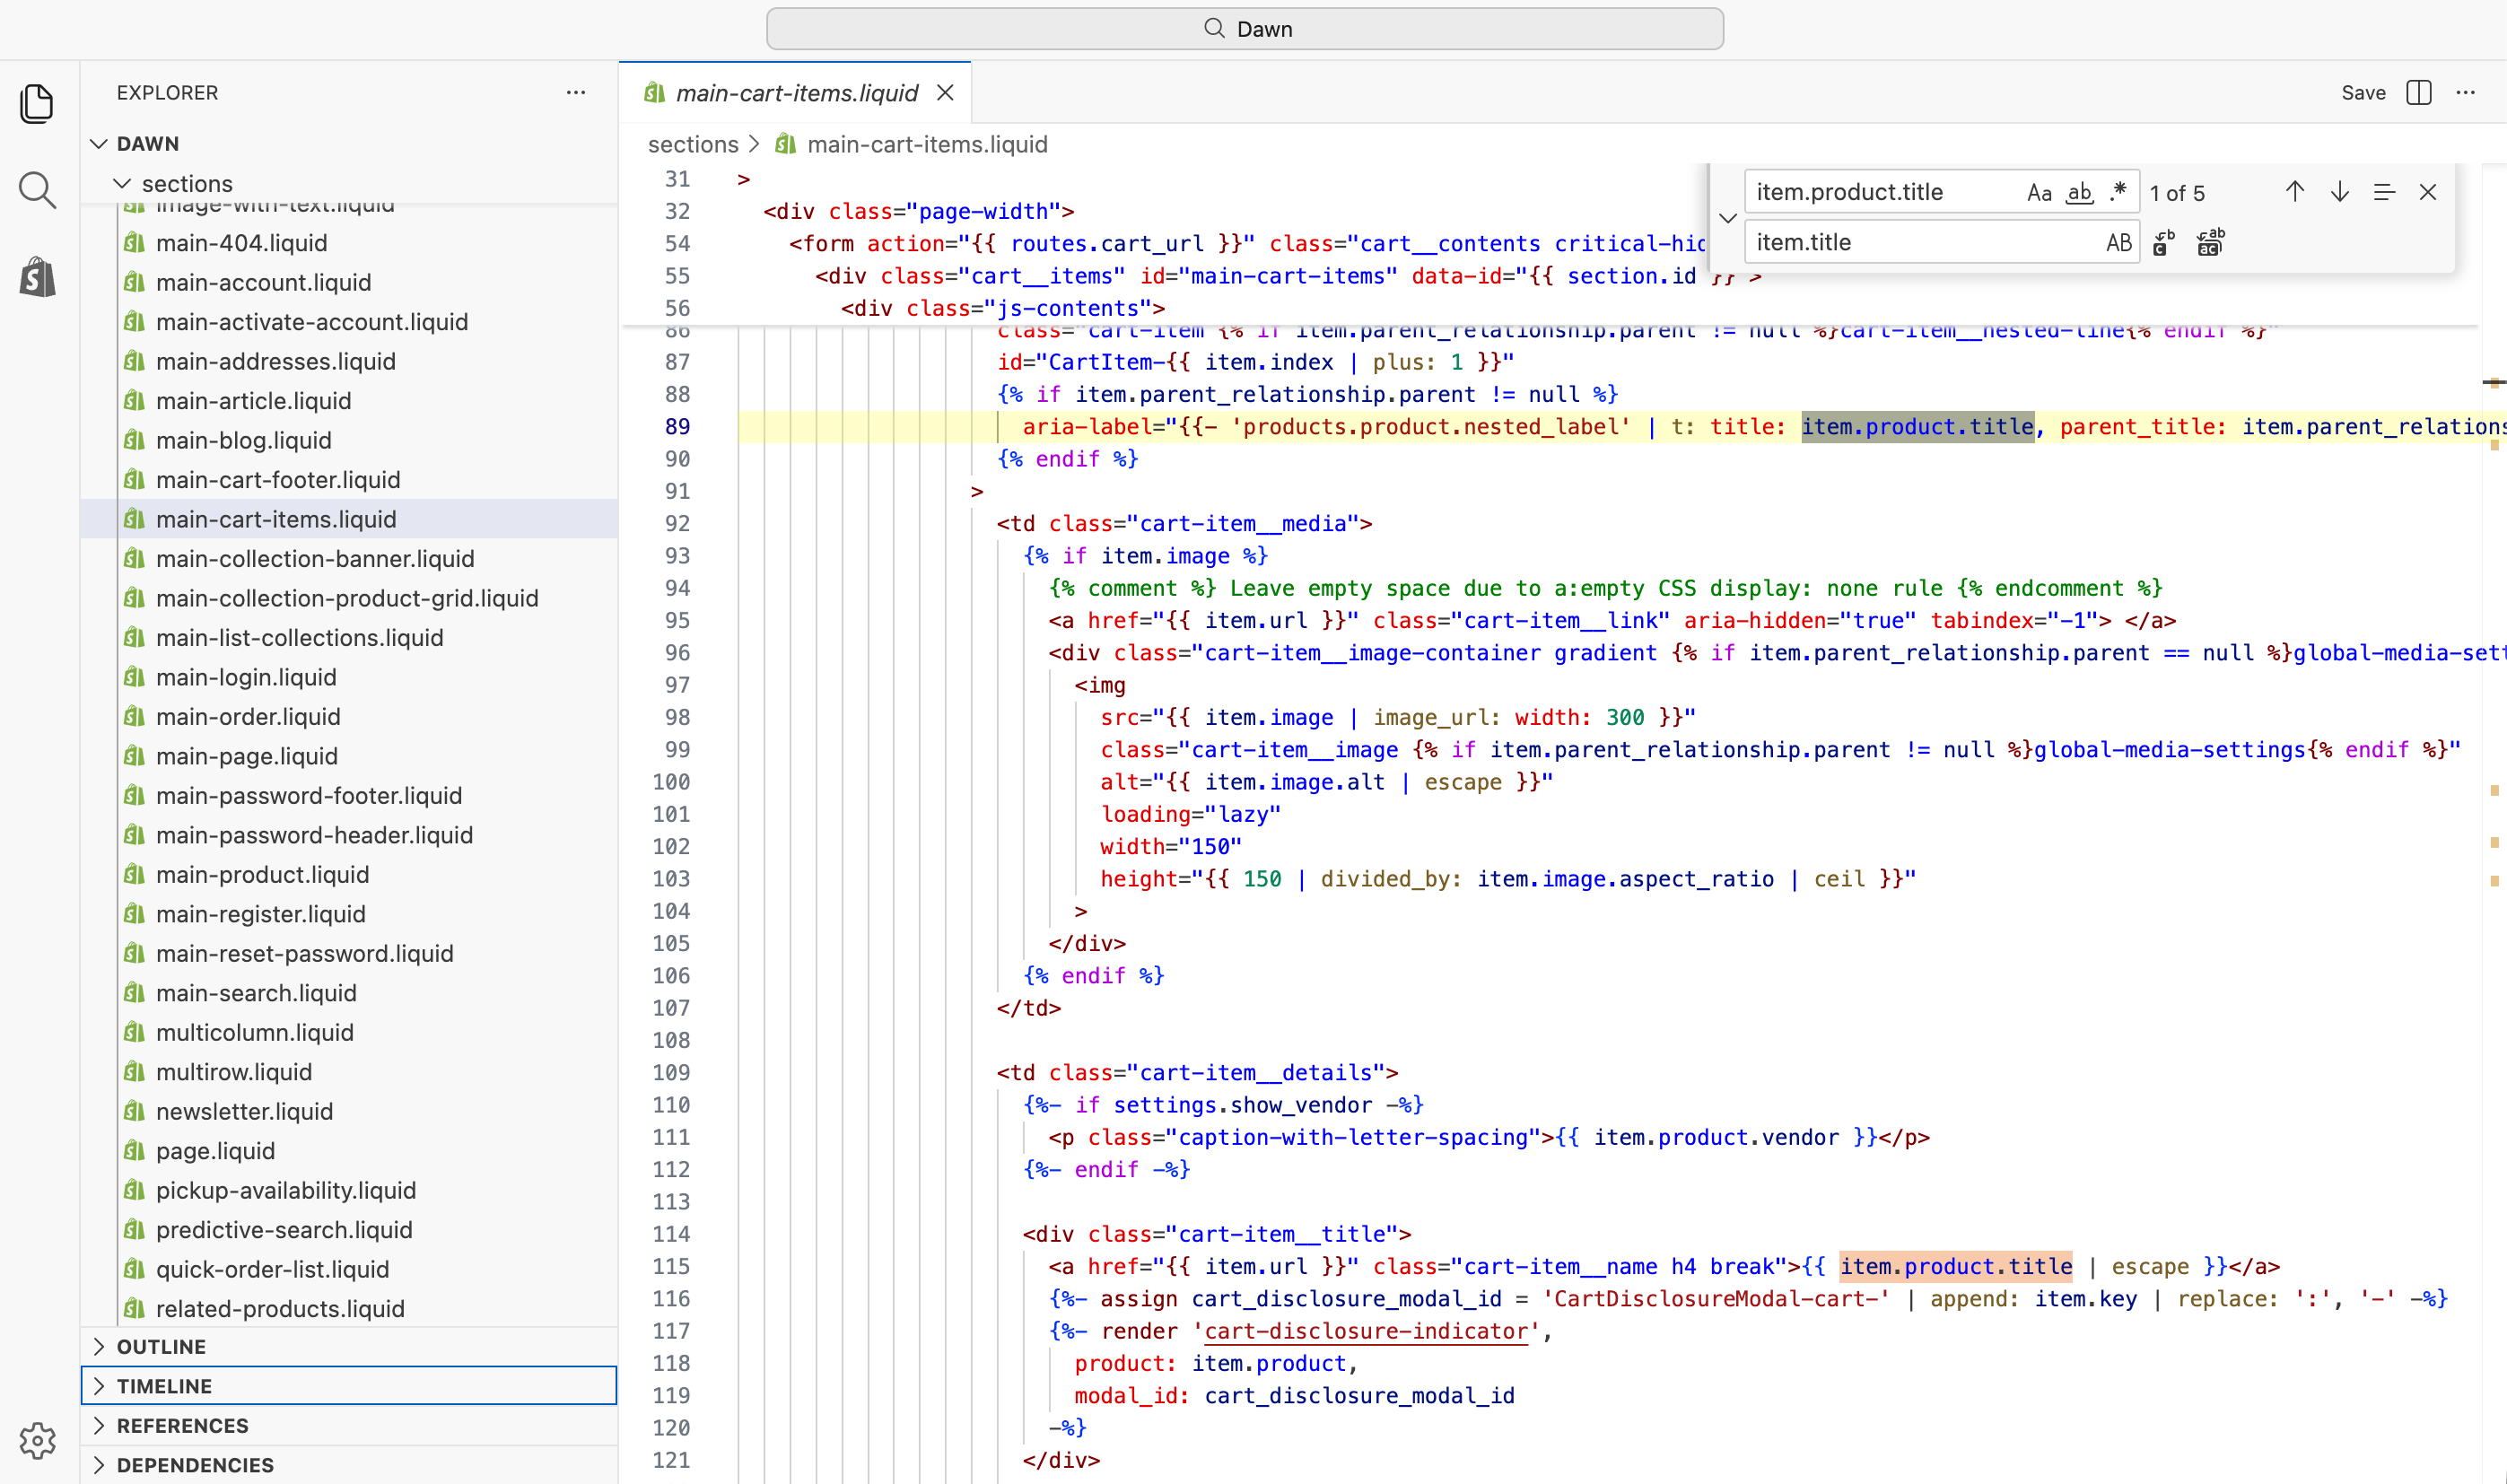
item.product.title with item.title
Updating the theme to render custom line item images
This change to the theme is a little more intricate, since for some inexplicable reason Shopify does not expose the custom image URL on the cart line item’s properties when rendering the cart. This is documented here: This image is visible in checkout only and is not persisted to orders.
Luckily the ShapeDiver App for Shopify stores the custom image URL in a hidden custom line item property called _imageUrl. This can be be used to adapt the theme code and render the custom image in the cart.
The following example shows how to do this for the Horizon theme.
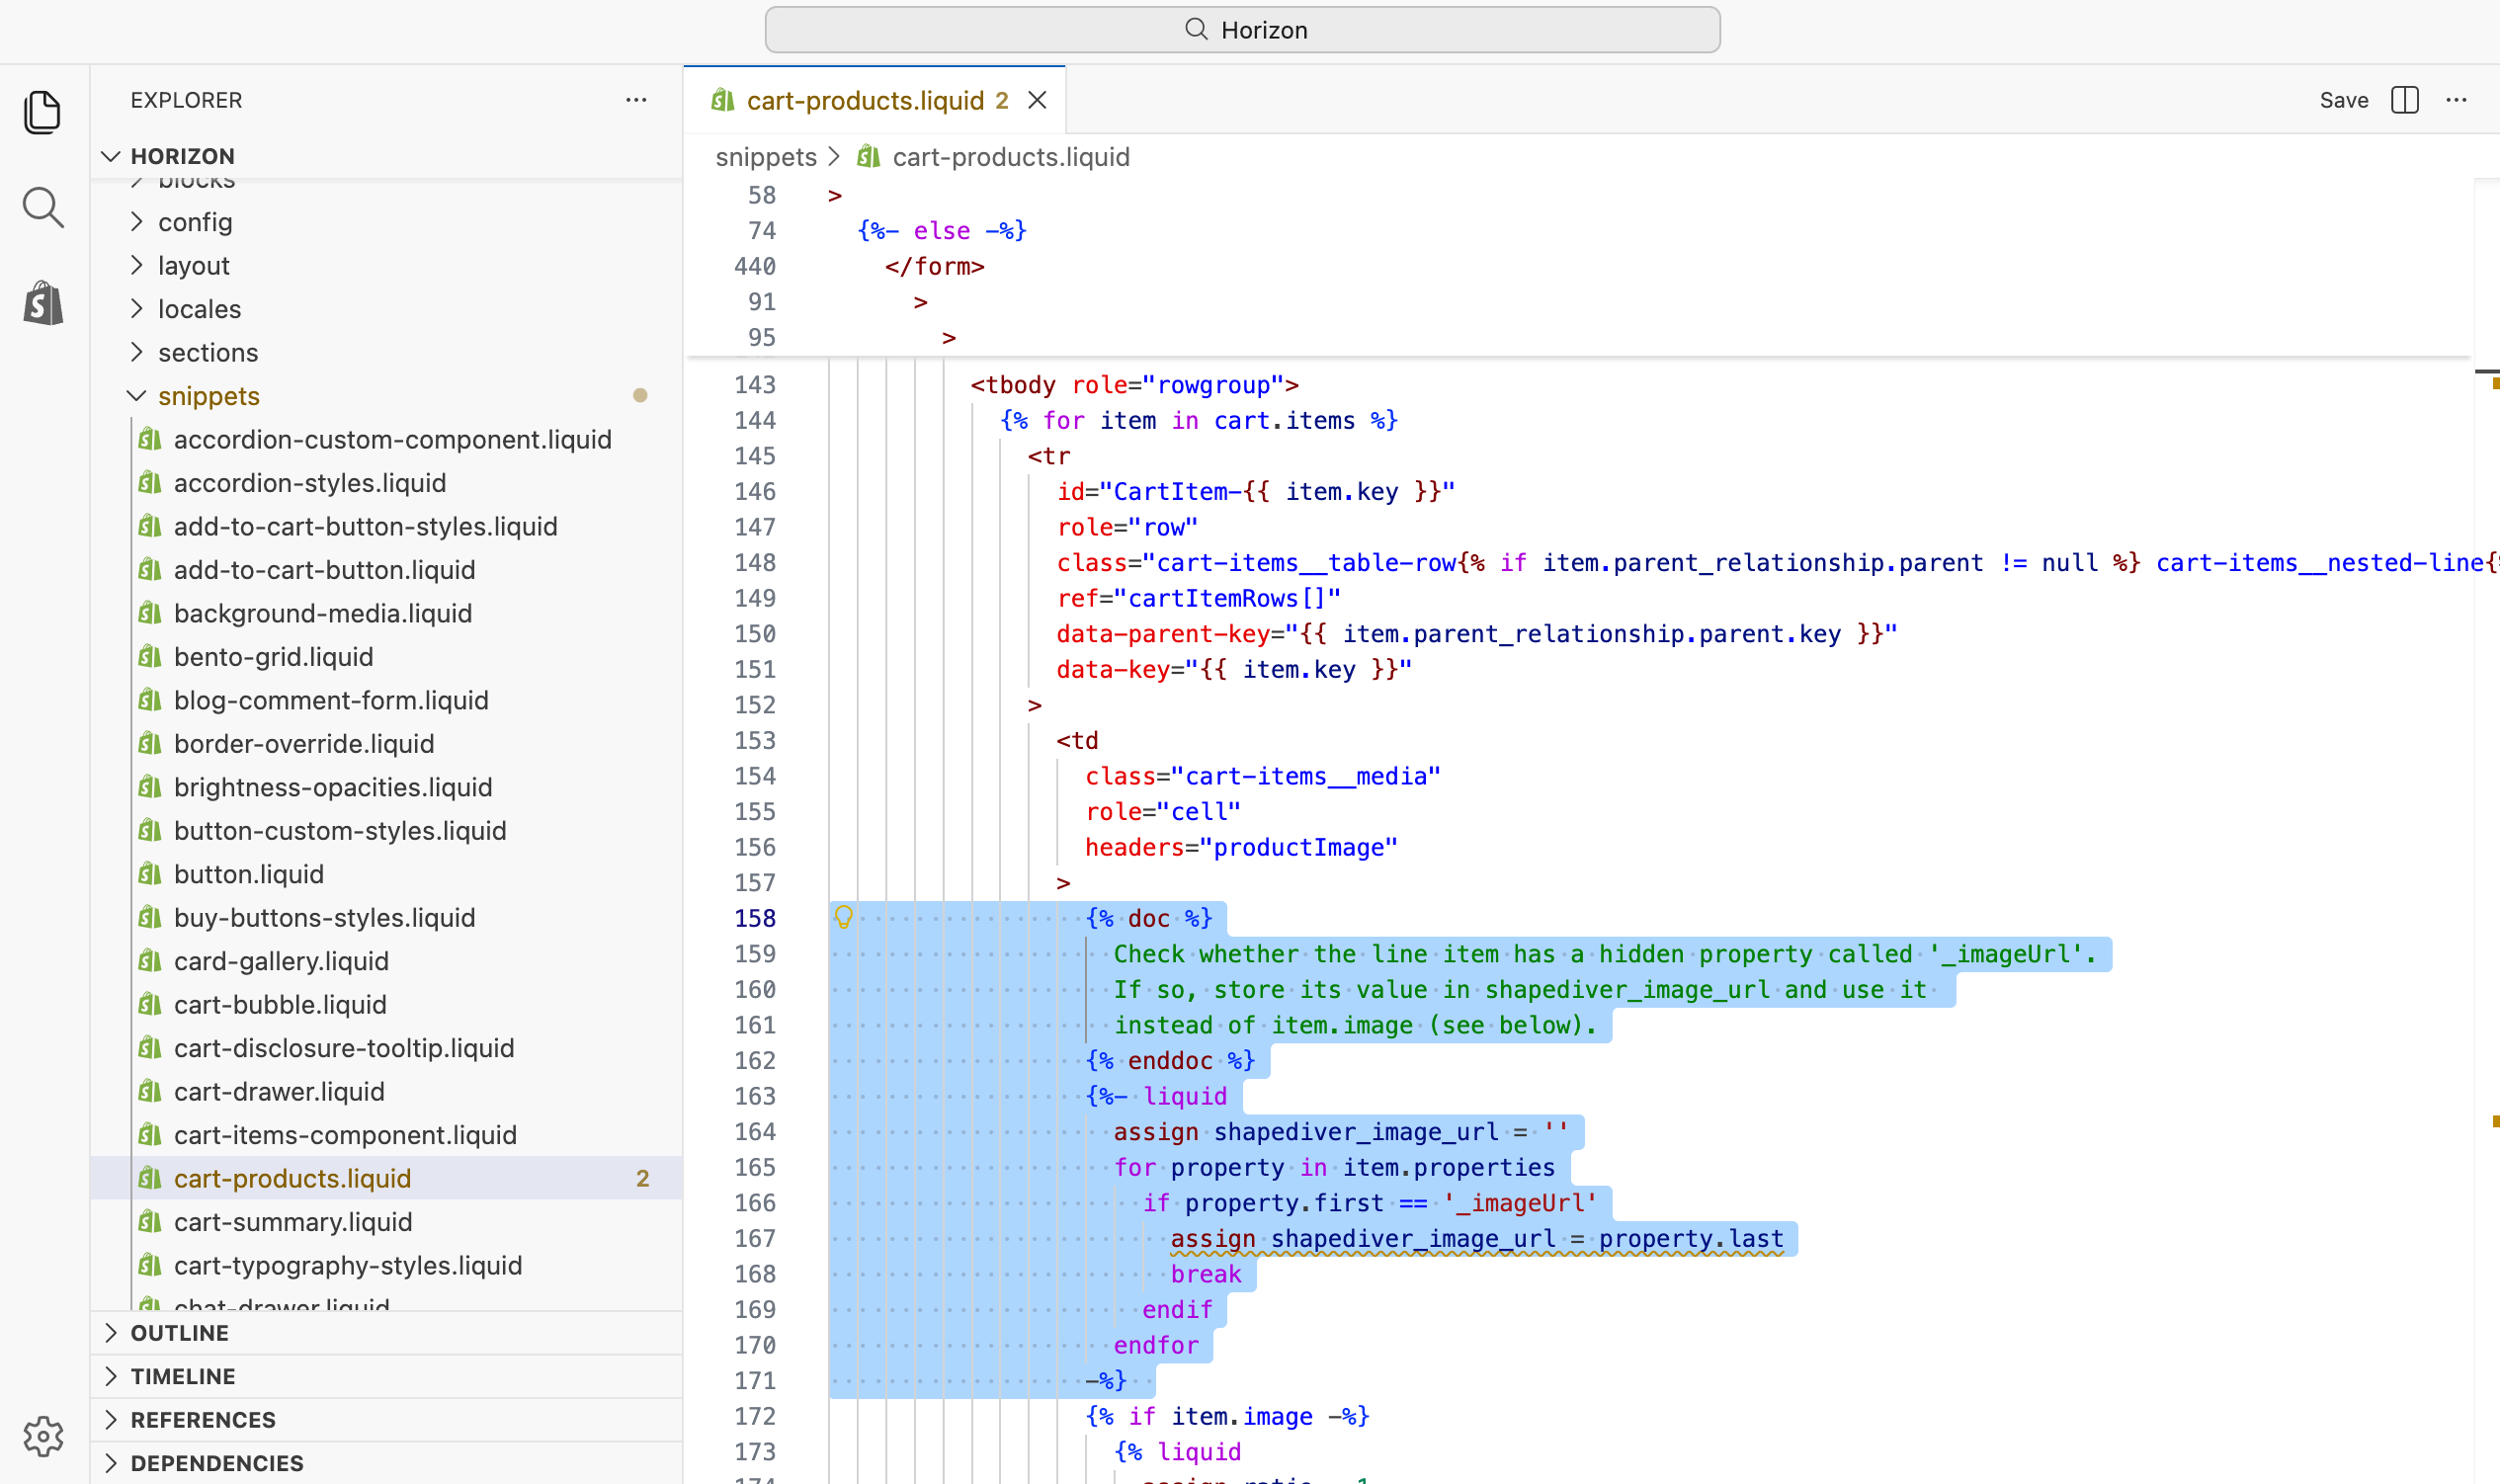
Step 1 - get custom image URL
The following block of liquid code extracts the custom image URL from the current line item. Place this block inside the loop that renders the line items.
{% doc %}
  Check whether the line item has a hidden property called '_imageUrl'.
  If so, store its value in shapediver_image_url and use it
  instead of item.image (see below).
{% enddoc %}
{%- liquid
  assign shapediver_image_url = ''
  for property in item.properties
    if property.first == '_imageUrl'
      assign shapediver_image_url = property.last
      break
    endif
  endfor
-%}
Step 2 - render custom image
Use the following block of liquid code to optionally render the custom image (if one exists), otherwise fall back to the default product image.
{% doc %}
  If the line item has a custom image, render it instead of item.image.
  Note:
    item.image returns the product's default image, even if a custom
    image has been set using ShapeDiver's cart transform function.
    This is documented here:
    https://shopify.dev/docs/api/functions/2026-01/cart-transform#CartTransformRunResult.fields.operations.lineUpdate.image
{% enddoc %}
{% if shapediver_image_url != blank -%}
  <img
    src="{%- echo shapediver_image_url | append: '&width=250' -%}"
    width="250"
    height="250"
    class="cart-items__media-image border-style"
  />
{%- else -%}
  {%- liquid
    echo item.image | image_url: width: 250 | image_tag: class: 'cart-items__media-image border-style', style: border_override
  -%}
{%- endif %}
We use it to replace the following code block:
{%- liquid
  echo item.image | image_url: width: 250 | image_tag: class: 'cart-items__media-image border-style', style: border_override
-%}
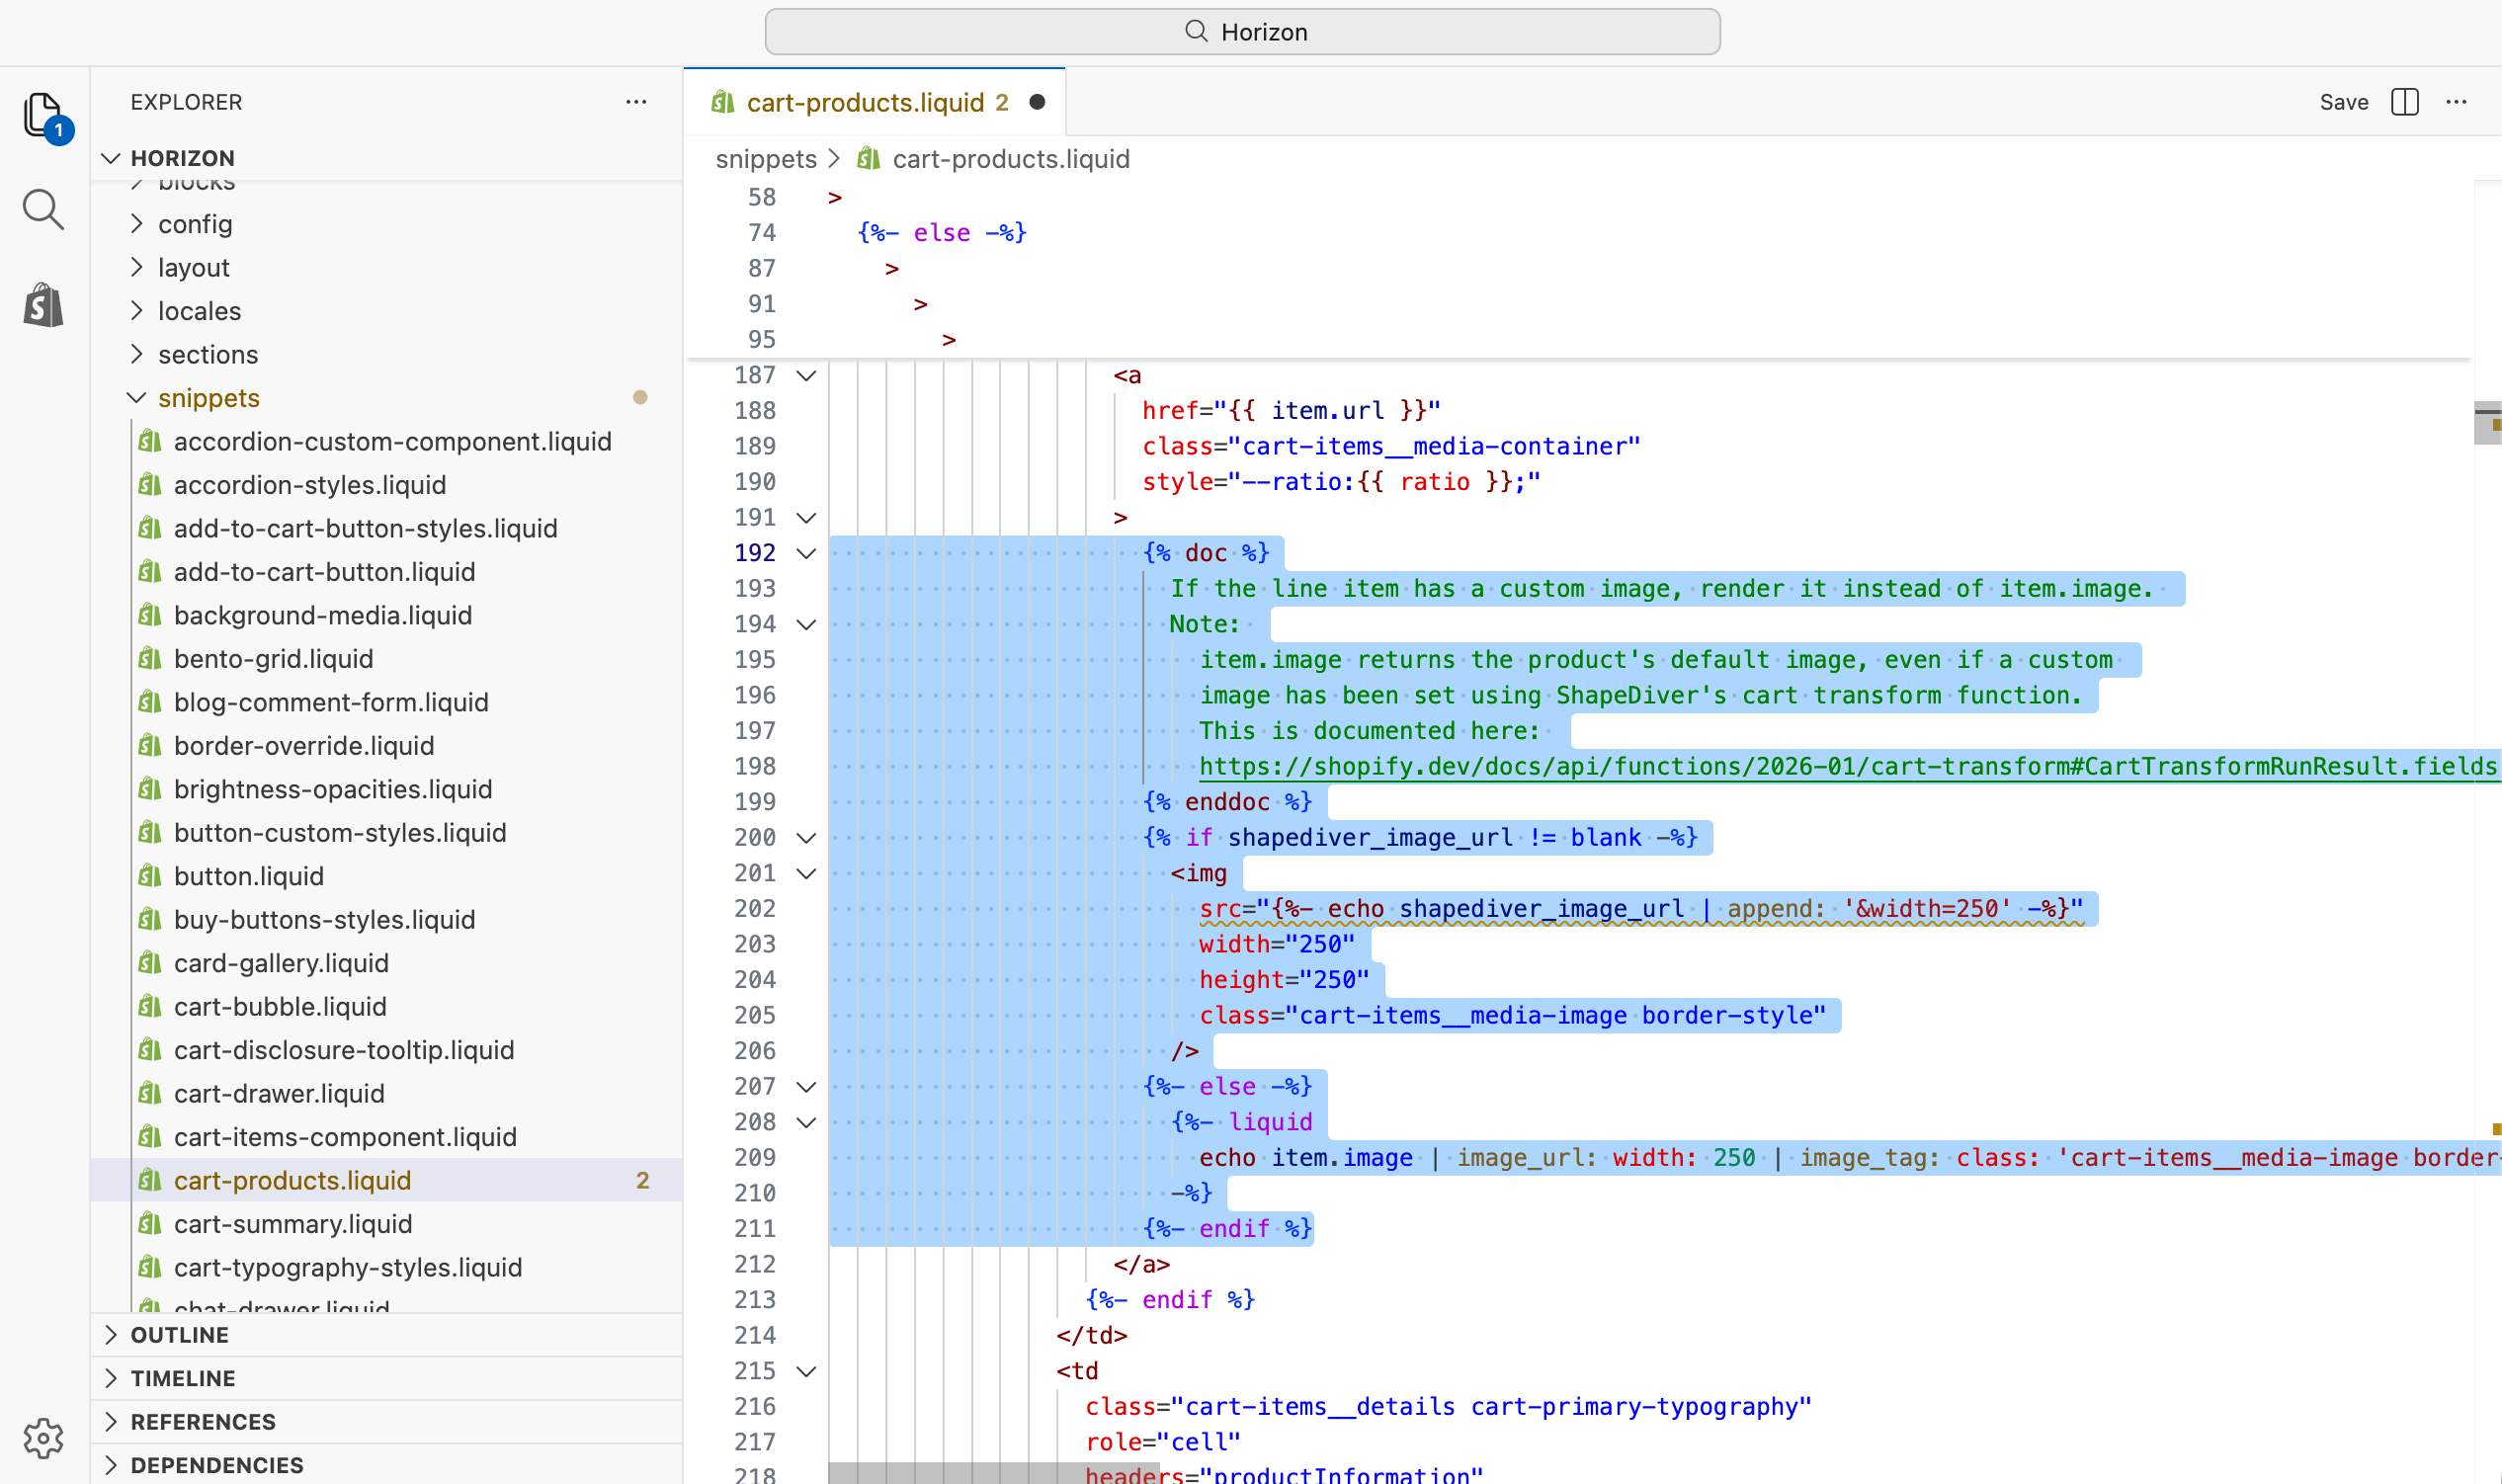
As the Horizon theme gets updated, the block for rendering the custom image might need to be changed.
If your store uses another theme, use the example code to apply the same principle to it.
As a paying customer, you can book onboarding calls here: Community and Support